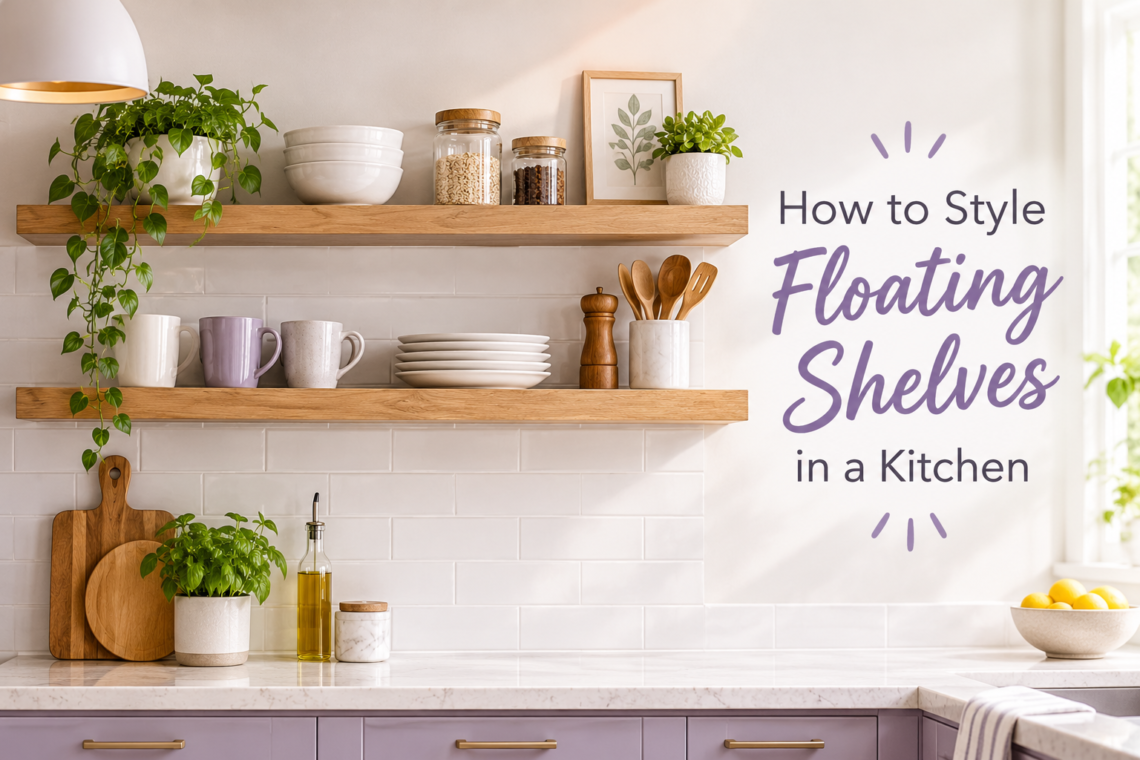
Imagine Hana on a busy Tuesday morning. She opens a cupboard, moves three bowls, and digs for her favorite mug. Her coffee goes cold before she finds it.
Meanwhile, a bare stretch of wall sits above her counter, doing nothing. A friend nudges her: “Hang a shelf.” Hana mounts two plain boards that weekend. Come Friday, the mugs sit within reach, the room feels lighter, and guests keep asking about her “cute shelves.”
That is the quiet magic of floating shelves for kitchen walls. They add storage, hold your favorite things, and cost far less than new cabinets.
But a bare board is only half the story. Style it badly and it looks like a yard sale. Style it well and it looks like a magazine page. This guide covers materials, placement, what goes on each shelf, and a simple formula that makes any setup look planned. Let’s get your walls working.
Why Do Floating Shelves for Kitchen Walls Work So Well?
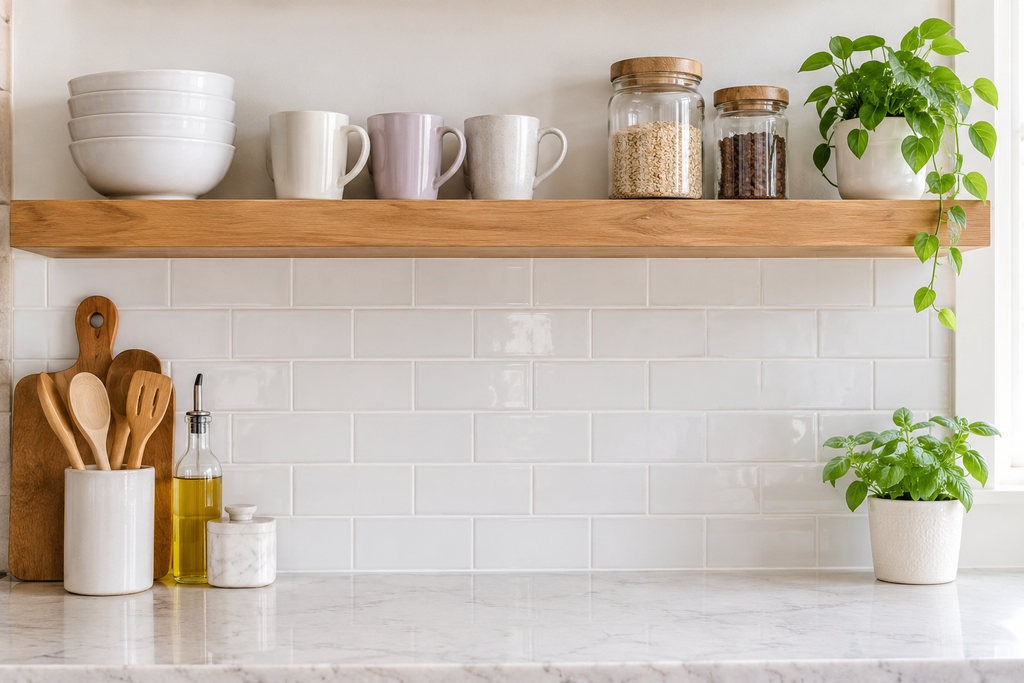
Open shelving has a loyal fan base for good reasons. Here are the biggest wins:
- Easy reach. Daily items sit at arm’s length, so cooking feels faster.
- A lighter look. No doors, no bulky frames, and no heavy boxes hanging overhead.
- Display space. Bowls, plants, and art finally get a stage.
- Friendly cost. A set of boards costs less than a run of cabinets.
- Quick changes. Swap the items in ten minutes and the whole room feels new.
Even a single kitchen shelf can break up a long wall of tile or paint. Two or three floating kitchen shelves can turn that wall into the focal point of the room.
How Do You Pick the Right Shelf Material?
The best floating shelves for kitchen use start with strong, well-sealed material. Steam, grease, and splashes are part of cooking, so pick a surface that handles them. Here is a quick comparison:
| Material | Look | Strength | Care | Best For |
|---|---|---|---|---|
| Solid wood | Warm and natural | Very strong | Wipe often, reseal yearly | Cozy and farmhouse kitchens |
| Plywood with veneer | Clean, even grain | Strong when braced | Wipe dry, avoid soaking | Budget builds and modern kitchens |
| Metal | Sleek and industrial | Very strong | Wipes clean easily | Modern and industrial kitchens |
| Glass | Light and airy | Medium, so watch the weight | Shows fingerprints | Small kitchens and glassware |
| Reclaimed wood | Rustic, full of character | Strong | Seal well | Farmhouse and boho kitchens |
Why Wood Is a Crowd Favorite
Fans of wood floating shelves kitchen style love the warmth. Wood hides small scratches, pairs with nearly any color, and softens hard surfaces like tile and steel. Choose boards between 1.5 and 2 inches thick for a chunky, solid look. Magnet’s blog on floating shelf kitchen ideas points out that thick natural wood suits tiled kitchen walls especially well.
Wooden kitchen shelves need one small chore. Seal them with a water-resistant, food-safe finish, and reseal once a year. Keep them a safe distance above the stovetop, since heat and grease age wood fast.
Wall mounted kitchen shelves in metal or glass work well too, especially in sleek, modern rooms.
Where Should You Hang Kitchen Floating Shelves?
Placement matters as much as style. Great floating shelves for kitchen layouts start with a clear purpose. Ask what you want within reach, then hang the shelf near the spot where you use it.
- Above the counter. Hang the lowest shelf between 15 and 20 inches above the countertop, so you can grab things without a stretch.
- Beside the range hood. Matching shelves on both sides frame the cooking zone.
- In place of upper cabinets. Open wall space makes a small room feel wider.
- Over a coffee corner. Mugs, beans, and a tray live in one spot.
- In an alcove or corner. A kitchen wall shelf in a dead corner turns wasted space into storage.
- Above a window or doorway. A slim shelf adds a home for plants or baskets.
Real-life example: Marcus mounted two shelves beside his range hood. The left one holds the oil, salt, and pepper he uses every night. The right one holds a plant and a cookbook. The setup looks balanced, and dinner prep got faster.
Tip: Tape paper cutouts on the wall first. Live with them for a day before you drill.
What Should You Put on Kitchen Shelves?
The best kitchen shelves mix useful items with a few pretty ones. Think of it as mostly daily use with a little charm on top.
Everyday Items That Look Good
- Matching white or wood plates and bowls in neat stacks
- Glass jars filled with pasta, rice, or beans
- Mugs and glasses lined up in a row
- Cookbooks you actually open
- Wooden spoons in a crock
- Cutting boards leaning against the wall
Pretty Extras
- A small plant or herb pot
- A framed print or small art piece
- A ceramic vase with dried stems
- A candle or a bowl of fresh lemons
Leave out bulky appliances, mismatched plastic containers, and sticky bottles. They break the look in seconds.
What Is the Simple Formula for Styling Kitchen Shelves?
Stylists repeat the same few moves because they work. CB2’s styling guide notes that open kitchen shelves keep everyday items close and let a tile backsplash show through. Use these eight steps and your shelves will look planned:
- Start with a blank slate. Clear every item off the shelves and the counter below. Fresh eyes spot clutter fast.
- Pick a palette of three colors. Two neutrals plus one accent, like white, wood, and sage green, keep things calm.
- Group in threes. Odd numbers look natural. A stack, a plant, and a jar make a tidy trio.
- Vary the heights. Mix tall, medium, and short pieces so the eye moves along the shelf.
- Layer front and back. Lean a cutting board or art piece against the wall, then place smaller items in front.
- Leave breathing room. Keep about a third of each shelf empty. Space makes the items you chose look special.
- Add one living thing. A small plant or a bowl of fruit brings color and life.
- Repeat one element. Echo a material or color on every shelf, like black handles or wood tones, so the whole wall ties together.
Quick example: On a 36-inch shelf, place a stack of three white bowls on the left, a small plant in the middle, and two glass jars on the right. Lean a wooden board behind them. Done.
Which Kitchen Floating Shelves Ideas Fit Your Style?
Pick the look that matches your home, then adjust it. Floating shelves for kitchen spaces can lean cozy, sleek, or playful, and each style has its own tricks.
Farmhouse
Use thick reclaimed wood, white dishes, enamel pitchers, and woven baskets. Add a vintage cutting board for texture.
Modern Minimal
Choose slim shelves in black or white. Show only a few items in one color family. Empty space is part of the design here.
Boho and Warm
Mix wood tones, trailing plants, patterned ceramics, and woven textures. Layer items freely, but keep one color thread running through.
Coastal and Fresh
Pair white shelves with blue-and-white bowls, glass bottles, and a piece of driftwood. The result feels breezy and bright.
How Do You Style Shelves in a Small Kitchen?
Small kitchens reward restraint. These kitchen floating shelves ideas keep tight rooms calm:
- Choose lighter colors. White and pale wood make walls feel farther away.
- Go long, not many. One long shelf looks calmer than three short ones.
- Keep depth modest. Around 8 inches deep leaves walking space clear.
- Limit each shelf to three or four items. Small rooms need quiet.
- Match the lines of the room. Align a shelf with a window sill or cabinet edge.
Picture a narrow galley kitchen with one pale wood shelf running above the counter. A row of mugs, two jars, and one small plant sit on it. The wall feels open, and nothing competes for attention.
How Do You Keep Shelves Safe and Tidy?
Pretty shelves must also stay put. A full set of dishes weighs more than most people guess.
Install Them Right
- Find wall studs with a stud finder.
- Use heavy-duty anchors when no stud sits in the right spot.
- Check the weight limit of the brackets before you load them.
- Use a level, a pencil, and plenty of patience.
- Hire a pro if pipes or wiring may hide behind the wall.
Keep Them Clean
- Wipe shelves weekly with a damp cloth.
- Rinse plates and glasses before use, since dust and grease settle.
- Rotate items each season for a fresh look and an easy deep clean.
What Mistakes Should You Skip?
- Overloading the boards. Crowded shelves look messy and risk a crash.
- Hanging them too high. If you need a stool every day, move them lower.
- Ignoring depth. Dinner plates need a deeper board than spice jars.
- Mixing too many colors. Stick with your palette of three.
- Placing them right above the stove. Heat and grease ruin finishes.
- Filling every inch. Empty space makes the display feel intentional.
- Forgetting the weight limit. Heavy stacks demand strong brackets.
Ready to Style Your Shelves?
Let’s return to Hana. She now keeps three white bowls, a small plant, and a jar of wooden spoons on her shelf, and she swaps one item each season. Her mugs stay within reach, and her coffee stays hot.
Floating shelves for kitchen walls give you storage, style, and a bit of personality, all in one weekend project. You do not need a big budget. You need a plan, a level, and a good eye for balance.
Pick one wall this weekend. Clear it, tape up paper templates, and test your formula. Then share your before-and-after in the comments, or pass this guide along to a friend with a bare wall.