Omar’s new apartment had a long, empty wall and a tower of books on the floor. Every time he walked past, the tower wobbled. Every visitor asked, “Why not just buy a bookcase?”
A bookcase felt bulky for the room. Then Omar spotted a photo of boards that seemed to grow right out of the wall, with no brackets in sight. He found the studs, marked a level line, and hung three shelves one Saturday afternoon. Come Sunday night, the tower was gone, the books sat in a neat row, and the wall looked like a magazine page.
That is the charm of floating shelves. They give you storage and display space while keeping the room open and light. But a few details decide if they look sleek or sag: style, size, material, and mounting.
This pillar guide walks you through all four, then tours each room with real ideas. Pull up a pencil and let’s start.
What Are Floating Shelves, and Why Do People Love Them?
These shelves attach with hidden hardware, so no brackets show. The board looks like it hovers on the wall. Most use a metal rod bracket, a hidden rail, or a French cleat tucked inside or behind the board.
People love them for good reasons:
- A clean look. No visible hardware means fewer lines and a calmer wall.
- A small footprint. They hold things without eating floor space.
- Flexible layouts. Hang one long board, a stack of three, or a zigzag.
- Odd-space fixes. Corners, alcoves, and narrow walls suddenly work.
- Easy restyling. Swap the items and the whole room feels new.
Here is the honest part. They look simple, but they depend on strong mounting. That is why this guide spends real time on weight limits and installation.
Which Style Fits Your Home?
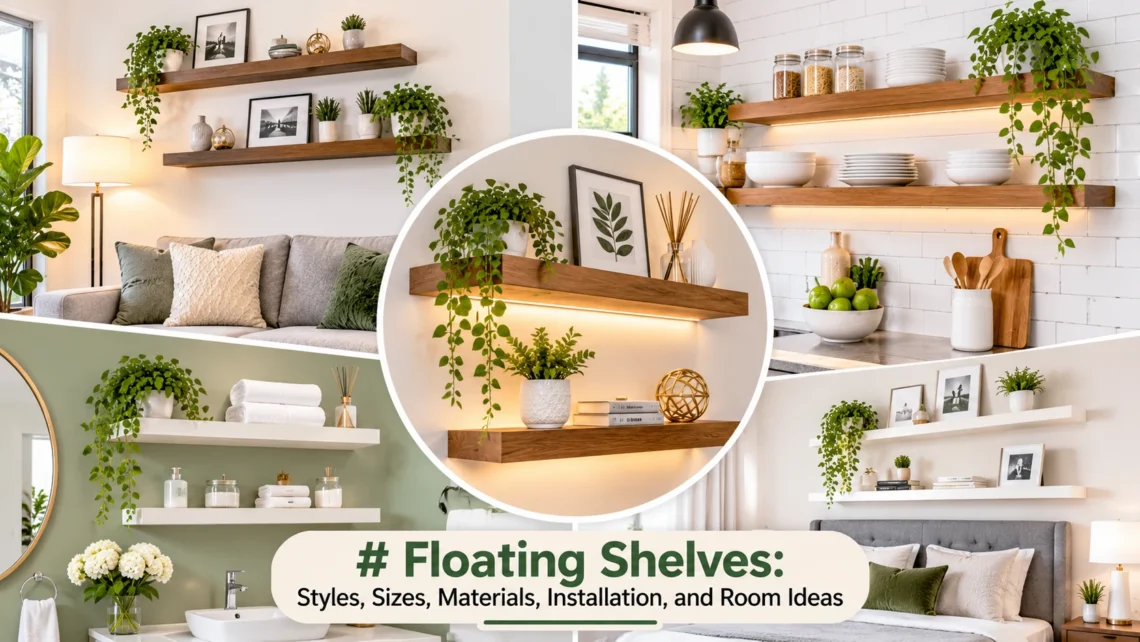
Pick a style that matches the mood of your room. Here are the main options.
Classic Straight Plank
A simple rectangular board. It fits every decor style and works in any room.
Thick or Live-Edge Slab
Boards two inches thick or more feel chunky and organic. Live-edge slabs keep the natural curve of the tree for a warm, rustic look.
Picture Ledge
A shallow shelf with a small lip in front. It holds art, photos, and kids’ books, and the lip stops items from sliding off.
Corner Shelves
These wrap into awkward corners and turn dead space into display space.
L-Shaped and U-Shaped
Shelves that wrap around a corner or frame a window. They feel custom and hold more.
Glass
Tempered glass keeps a small room light. Bathrooms and display walls suit it, though it shows fingerprints.
Slim Metal
Steel or aluminum shelves look sleek in modern and industrial rooms. They stay thin yet strong.
Staggered Sets
Shelves of different lengths, hung in an offset pattern. Together they act like wall art.
What Size Should Floating Shelves Be?
Size decides how a shelf looks and how well it works. Start with what you plan to store, then pick the depth, length, and thickness.
- Depth follows your items. Shallow boards hold photos. Deeper ones hold books and plates.
- Length should match your wall and your studs. In most homes, studs sit about 16 inches apart on center, so a 32- or 48-inch board can land on two or three of them.
- Thickness sets the style. Slim boards look light. Thick ones look bold and hide hardware better.
- Spacing matters too. Leave about 12–14 inches between shelves for books, and 10 inches for small decor.
Use this table as a starting point:
| What You Store | Depth | Length | Thickness |
|---|---|---|---|
| Photos and small art | 4–6 in | 24–48 in | 1 in |
| Books and decor | 8–10 in | 36–48 in | 1.5 in |
| Plates, bowls, and mugs | 10–12 in | 36–48 in | 1.5–2 in |
| Bathroom essentials | 6–8 in | 24–36 in | 1–1.5 in |
| Plants and light decor | 6–8 in | 24–48 in | 1.5 in |
Keep the most-used shelf between waist and shoulder height. Save the high boards for pretty things.
Which Materials Work Best?
The material decides weight, look, and upkeep.
- Solid wood (oak, walnut, maple, pine). Strong, warm, and easy to refinish. A top pick for heavy items.
- Plywood with veneer. Stable and strong, with a clean grain look at a lower price.
- MDF or laminate. Budget friendly and smooth, but it holds less and hates water.
- Metal (steel or aluminum). Thin, tough, and modern. Powder-coated finishes resist rust.
- Glass. Light and airy, best for display rather than heavy loads.
- Stone or marble. Gorgeous and heavy. It needs very strong mounting.
- Reclaimed wood. Full of character, though you should seal it well.
Tip: Match the finish with other wood in the room, like a table or a door. Seal wood in kitchens and bathrooms so steam does not warp it.
How Much Weight Can They Hold?
There is no single number. Capacity depends on three things: what the bracket is screwed into, the size of the shelf, and the bracket itself. Studs hold the most. Drywall anchors hold far less, so they suit light decor only.
Add up what you plan to display before you buy. Books weigh more than most people expect. A stack of ten hardcovers can reach around 20 pounds. This Old House’s wall-mounted shelf guide makes the same point: estimate the weight of your items first, and pick a spot away from light switches and air vents.
Three Common Mounting Types
- Hidden rod brackets. Metal rods slide into holes in the board. More rods and more studs mean more strength.
- French cleat. Two angled strips lock together, one on the wall and one on the shelf. It works well for thick boards.
- Hidden rail kits. A metal rail screws on the wall and the shelf slides over it. Many store-bought sets use this design.
Always follow the weight rating from the maker. If you are unsure, load lighter than the rating.
How Do You Install Them Safely?
Home Depot’s installation guide opens with the same first move every pro makes: find the studs with a stud finder and mark them with light pencil lines. It says at least one mounting screw should land in a stud, and it calls for proper anchors when no stud sits in the right place.
What you need: stud finder, level, pencil, tape measure, drill, screwdriver, and heavy-duty anchors if no stud fits.
- Plan the spot. Tape paper cutouts on the wall and live with them for a day. Skip light switches and air vents.
- Find the studs. Mark each one with a pencil line. Check for wires and pipes before you drill.
- Draw a level line. Mark where the top of the bracket or cleat will sit.
- Mount the hardware. Screw the bracket or cleat into studs. Use anchors only when no stud lines up.
- Slide the shelf on. Check that it sits flat and level.
- Lock it in. Many kits use a set screw or a bottom screw. Follow the instructions.
- Load it slowly. Add items in small batches and watch for any movement.
Tip: Hang floating shelves after the paint dries, and wipe off your pencil marks when you finish.
Unsure about plaster, brick, or hidden pipes? Call a pro. A short visit costs less than a repair.
Floating Shelves in the Living Room and Bedroom
These two rooms give you the most room to play.
Living Room
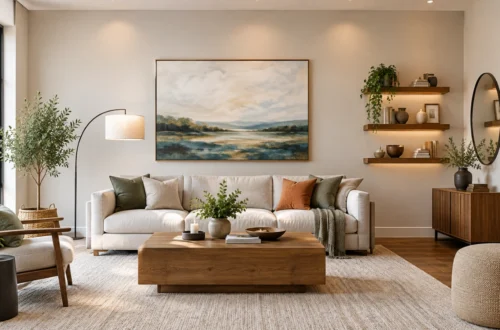
- Above the sofa. Hang a staggered set of two or three boards, and mix books with art.
- Beside the TV. Matching shelves on both sides frame the screen and add storage.
- A gallery ledge. Lean frames on one long picture ledge. Swapping art takes seconds.
- Plant wall. Use a row of narrow boards for small pots and trailing greens.
Bedroom
- Over the headboard. One long ledge holds art, a lamp, or books.
- A nightstand swap. Hang a shelf at bed height in a tight room and free up floor space.
- A reading nook. Place a short shelf beside an armchair for a book and a mug.
- Closet walls. Add shelves inside for folded sweaters and boxes.
Kitchen, Bathroom, Entryway, and Office Ideas
Kitchen
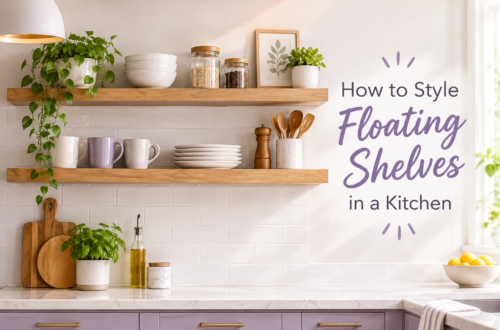
Store everyday bowls, mugs, and jars in reach. Choose thick wood or metal, and keep the boards away from the stove, since heat and grease age finishes fast.
Bathroom
Glass or sealed wood works best. Roll towels, add a plant, and set out a candle. Hang the shelf away from direct shower spray, and run the fan after every shower.
Entryway
A slim shelf with a few hooks below becomes a drop zone. Add a small tray for keys, a mirror above, and a basket for scarves.
Home Office
Hang shelves above the desk for books, binders in matching boxes, and a small lamp. Keep the desk surface clear, and the room feels calm.
Kids’ Rooms
Picture ledges at child height let little ones pick their own books. Round the corners if you can, and keep heavy items off the high boards.
How Do You Style Them Without Clutter?
Styling is where the shelves go from useful to lovely. Use these six moves:
- Group in threes. Odd numbers look natural. A stack of books, a plant, and a small bowl make a tidy trio.
- Vary the heights. Mix tall, medium, and short pieces so the eye travels.
- Pick a palette. Stick with two or three colors across all the shelves.
- Leave space. Keep about a third of each board empty. Space makes your items stand out.
- Repeat a material. Echo wood, brass, or black metal on every shelf.
- Edit each season. Swap one or two items and keep the rest.
Mistakes That Ruin the Look
- Overloading the boards, which looks messy and risks a crash
- Hanging shelves a little crooked
- Skipping the studs
- Choosing a shelf that is too shallow for the items
- Using one big shelf where a staggered set would look better
Ready to Put Your Walls to Work?
Let’s return to Omar. A few months later, he hung a second set in the hallway for photos and a plant. Each project took an afternoon, and the walls finally felt useful.
Floating shelves reward people who plan. Pick a style that suits your room, choose the right size and material, and mount everything into studs. Then style the boards with a little patience and a lot of empty space.
Here is your next step. Pick one wall this weekend, tape up paper cutouts, and test your stud finder. Then share a photo of your finished shelves in the comments, or pass this guide along to a friend with a bare wall.