Picture Leo on his first night in a new studio apartment. The bed sits against one wall, the sofa faces it, and the desk squeezes in beside the fridge. Everything fits, yet the room feels like a waiting area.
His friend Mia lives in a one-bedroom across town. She closes a door at night, and the day falls away. Leo wonders if a studio can ever feel like that.
It can. The secret is not more square feet. It is zoning: giving every activity its own corner, so one room acts like several.
In this guide, you will see how a studio compares with a one-bedroom, which layouts suit different room shapes, and how you can separate sleeping, living, eating, and working without building a single wall. Grab a tape measure and a notebook.
What Is a Studio Apartment, and How Is a One-Bedroom Different?
A studio is one main room that holds the sleeping, living, and often cooking areas. The bathroom has its own door, and the kitchen may sit in a nook or along one wall. A one-bedroom has a separate sleeping room with a door.
HGTV’s studio floor plan guide puts the line neatly: once the sleeping area is fully separated from the rest, the home usually counts as a one-bedroom rather than a studio.
Some layouts sit in between:
- Alcove studio. A small nook holds the bed, and the rest stays open.
- Junior one-bedroom. A partial wall or sliding door half-closes the sleeping space.
- L-shaped studio. The short leg of the L acts like a built-in bedroom corner.
Definitions vary by city, so treat these as friendly labels, not strict rules.
Studio vs. One-Bedroom: A Quick Comparison
Here is how the two layouts stack up for daily life:
| Feature | Studio | One-Bedroom |
|---|---|---|
| Layout | One main room plus a bathroom | Separate bedroom, living area, and bathroom |
| Privacy | Low, so zoning creates it | High, since a door closes off the bed |
| Furniture planning | Every piece must multitask | Each room has one clear job |
| Natural light | Shared across the whole room | Split, and the bedroom may get less |
| Hosting | Guests see the bed area too | The bedroom stays out of sight |
| Cleaning and heating | Small area, quick to tidy | More rooms, more upkeep |
| Main design challenge | Zoning and storage | Furniture scale and flow |
Neither is better. They are different design puzzles. A studio asks you to separate areas with furniture and light. A one-bedroom asks you to fill separate rooms well.
How Should You Plan Your Studio Layout?
Planning a studio apartment layout starts with fixed points, not furniture. Windows, doors, the kitchen, and outlets will not move, so build around them.
- Measure the room. Write down the length and width, plus the size of each window and door.
- Mark the fixed points. Draw windows, doors, outlets, radiators, and the kitchen on paper or in a free floor-plan app.
- Choose the anchor wall. Place your biggest piece, usually the bed or sofa, against the longest solid wall.
- Put the bed far from the door. The sleeping area feels calmer when it sits in the back.
- Keep walkways clear. Leave about 30 inches for main paths.
- Test with painter’s tape. Mark furniture outlines on the floor and walk around them for a day.
Tip: Keep tall storage along walls and use low furniture where you want the room to feel open.
Zoning Your Studio Apartment: The Five Zones
Zoning means giving each activity a clear spot. Most studios need five.
The Sleeping Zone
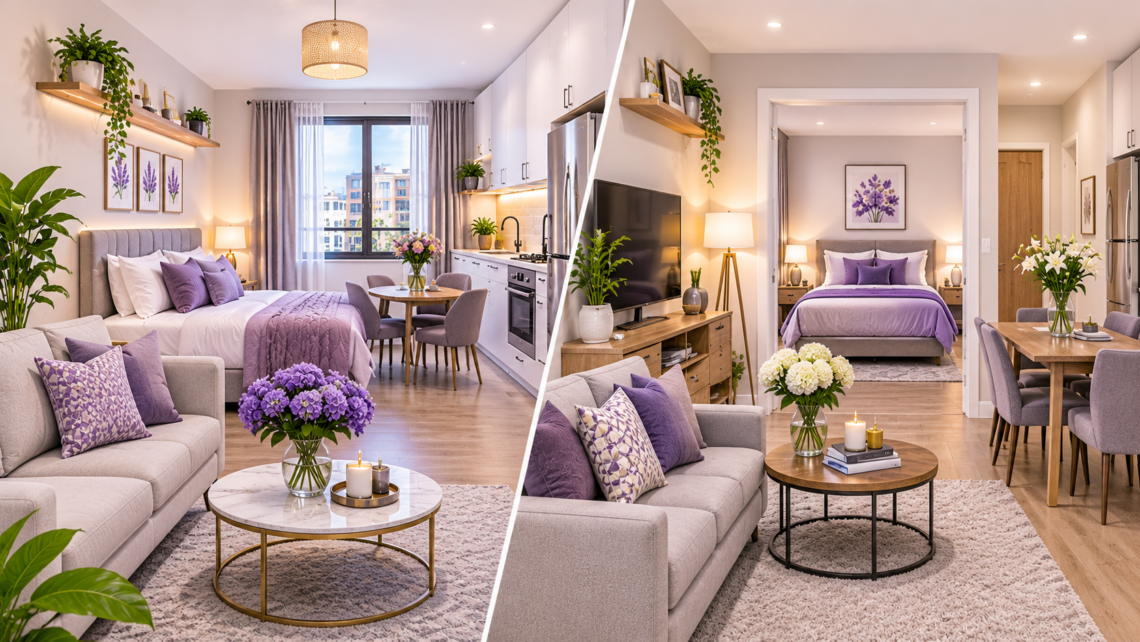
Aim for the quietest corner. Put the headboard on a solid wall, add warm bedside lights, and place a rug under the bed to mark the zone.
The Living Zone
Anchor it with a sofa and a rug. Add a small coffee table, a lamp, and one cozy chair if space allows. This zone should get the best light.
The Eating Zone
A slim table, a drop-leaf design, or a bar counter near the kitchen does the job. It can double as a desk for video calls.
The Work Zone
Place a desk near a window. Add a lamp and a shelf, and keep the setup tidy so you can leave work behind at night.
The Entry and Storage Zone
Hooks, a shoe bench, and a narrow console make the door area work. An open shelf set sideways near the entry softly separates it from the living space.
Which Layout Fits Your Room Shape?
Room shape drives the best plan. Try these starting points.
Long and Narrow
Put the entry and kitchen at one end, the living zone in the middle, and the bed at the far end. A tall open bookshelf or a curtain between the living and sleeping areas adds depth.
Square
Use the corners as zones. Float the sofa so its back faces the bed, and tuck a desk or dining table into a different corner.
L-Shaped
The short leg of the L makes a natural sleeping nook. Hang a ceiling-mounted curtain for privacy at night, and keep the long section for living and dining.
Wide With Big Windows
Keep furniture low near the glass so light travels. Put the bed on a side wall, and the sofa facing the view.
How Do You Separate Sleeping and Living Without Walls?
In a studio apartment, one strong boundary beats five weak ones. Apartment Therapy’s roundup on separating living and sleeping spaces suggests a dresser between the sofa and the bed, and an area rug as a reliable fallback. Here are more ideas:
- The sofa-back boundary. Face the sofa away from the bed. Add a narrow console behind it for lamps and storage.
- An open bookshelf. Set it sideways. It divides space but still lets light pass.
- A ceiling-track curtain. Cheap and flexible. Pull it closed at night and open it by day.
- Two rugs. Use different textures under the bed and the sofa, and let furniture legs sit on the edges.
- A folding screen or half wall. It blocks sightlines from the front door.
- Layered lighting. Give each zone its own lamp: a floor lamp by the sofa, sconces by the bed, and a task light at the desk.
- A raised platform or loft bed. Great for high ceilings. The space below becomes a desk or reading nook.
- Color zoning. Paint or wallpaper the wall behind the bed in a deeper shade.
Pick one or two, not all eight. Too many dividers chop the room into tiny pieces.
What Furniture Earns Its Space?
In a small room, every piece should work twice.
- Murphy bed. Folds into the wall and frees the whole floor by day.
- Loft bed. Adds a floor of living space beneath the mattress.
- Daybed or sofa bed. Gives you a couch by day and a bed at night.
- Drop-leaf or extendable table. Seats one for lunch and four for dinner.
- Nesting tables. Pull them out for guests and tuck them away after.
- Wall-mounted desk. Folds flat and keeps the floor clear.
- Storage ottoman or bench. Holds blankets and gives extra seating.
- Bed with drawers. Replaces a dresser in the tightest layouts.
Choose slim legs on sofas and tables. Raised furniture lets you see the floor, and the room feels bigger.
How Do Light, Color, and Storage Change the Feel?
Light Each Zone
One ceiling light flattens a studio. Use three light sources at different heights: a floor lamp, a table lamp, and a task light. Warm bulbs in the sleeping zone signal rest.
Keep Color Calm, Add Accents
Choose one base color for walls and big furniture, then add a different accent in each zone. A green throw by the bed, a mustard chair in the living zone, and a blue lamp at the desk give each area an identity without clutter.
Build Up, Not Out
Tall shelves along one wall hold more than wide shelves across three. Add hooks, under-bed boxes, and over-door racks. Mirrors across from windows bounce light deeper into the room.
Which Setup Matches Your Life?
Pick the layout that fits how you actually live.
- The remote worker. Put the desk near the window, add a dedicated lamp, and use a curtain to hide the bed during calls.
- The couple. Use a loft bed or a sturdy divider, and give each person a storage spot.
- The frequent host. Place the living zone in the best light and hide the bed behind a bookshelf or inside a Murphy bed.
- The minimalist. Build one wall that holds the Murphy bed, a desk, and shelves, then leave the rest empty.
Quick test: Stand at the front door. If you can see your pillows, add a divider.
Ready to Zone Your Space?
Let’s return to Leo. He turned the sofa around, laid a rug under the bed, and hung a curtain on a ceiling track. Now the room has a front half for living and a back half for sleep. It feels a lot like Mia’s one-bedroom, minus the walls.
A studio does not need more space. It needs a plan. Measure the room, mark your five zones, and pick one strong boundary. Then add light, storage, and furniture that works twice.
Here is your move for this weekend. Tape the zones on the floor with painter’s tape, walk through your day, and adjust. Then share your before-and-after in the comments, or pass this guide along to a friend with a one-room home.