Picture Jordan, a renter with beige walls and a lease that says “no paint.” Every weekend, Jordan scrolls through room photos full of bold patterns and sighs.
Then a friend sends a text: “Did you try the stick-on kind?” Jordan orders one roll as a test, peels back the liner, and presses a strip on the wall behind the sofa. Twenty minutes later, the room looks like a different home. Eight months later, move-out day arrives, and the paper peels off without a mark.
Jordan’s secret was peel and stick wallpaper. It sticks without paste, comes off without drama, and works in nearly every room, as long as you prep well and choose well.
This guide covers it all: what it is, who it suits, how to measure and hang it, and a room-by-room tour of the best spots. You will also get fixes for bubbles, peeling, and removal. Grab a tape measure and keep reading.
What Is Peel and Stick Wallpaper, and How Does It Work?
This wall covering is self-adhesive. Each roll or panel has a printed front and a sticky back covered with a paper liner. Pull off the liner, press the sheet on the wall, smooth it out, and you are done. No paste, no bucket, and no water.
Most versions use vinyl or a vinyl-fabric blend. That makes them washable, and a damp cloth handles most smudges.
Here are the common types:
- Rolls that you hang in strips, like classic paper
- Murals that arrive as large panels and form one big image
- Textured sheets that mimic grass cloth, brick, or wood
- Small squares for shelves, drawers, and tight spots
The adhesive is the star. It grips firmly, yet most brands let you lift and reposition a panel during hanging, which is why beginners like it.
Is Removable Wallpaper Right for You? Pros, Cons, and a Quick Comparison
This Old House’s guide for homeowners and renters describes these papers as a versatile, easy-to-use option for both groups, and that matches what most people find.
The Pros
- Fast installs. Many people finish a wall in an afternoon.
- Clean hanging. No paste, no mess, no steamer.
- Easy removal. On smooth, well-painted walls, it often peels off cleanly.
- Huge pattern range. Florals, stripes, murals, and textures cover every taste.
- Low commitment. Bored in two years? Peel and start over.
The Cons
- Wall prep matters. Rough or dusty walls ruin the grip.
- Cheap sheets wrinkle. Thin vinyl creases and stretches.
- Seams show up close. Patterns need careful matching.
- Heat and steam can loosen it. Keep it away from stoves and shower spray.
Here is how it stacks up against other options:
| Feature | Peel and Stick Wallpaper | Traditional Wallpaper | Paint |
|---|---|---|---|
| Install time | A few hours, beginner friendly | Longer, with paste and skill | Moderate, with prep and drying |
| Removal | Peels off, often cleanly | Scraping, steaming, and repairs | Needs a repaint |
| Cost | Low-medium | Medium-high | Low |
| Pattern choice | Huge range | Huge range | Color only, unless you stencil |
| Lifespan | Several years with care | Many years | Several years |
| Best for | Renters, accent walls, quick updates | Long-term homes and large rooms | Whole-house color |
How Do You Prepare Your Walls and Measure Right?
Prep decides the result. A great pattern on a dusty wall will peel, and a plain pattern on a clean wall will last.
Prep the Surface
- Clean the wall. Wipe with mild soapy water, rinse, and let it dry fully.
- Fill and sand. Patch holes and dents, then sand the spots smooth.
- Check the finish. Smooth, satin, or semi-gloss paint grips best. Bare drywall and heavy textures like orange peel or knockdown cause trouble. Apartment Therapy’s pro tips warn about matte painted surfaces too, since the paint can lift during removal.
- Let fresh paint cure. Wait several weeks after painting.
- Run a test patch. Stick a small piece in a hidden corner, leave it for a week, then peel it. If the paint stays put, go ahead.
Measure With Care
- Measure the wall height and add a few inches for trimming.
- Divide the wall width by the panel width, then round up.
- Order 10 to 15 percent extra for pattern matching and mistakes.
- Buy every roll from the same batch so colors match.
Quick example: A wall stands 8 feet tall and 12 feet wide. With 20.5-inch panels, you need about 7 panels. Order 8 so a slip does not stop the project.
Gather Your Tools
Tape measure, level, pencil, sharp utility knife with fresh blades, smoothing tool, straight edge, step stool, and scissors. A helper makes tall walls much easier.
What Is the Simple Installation Process?
Take your time. Rushing causes crooked lines, and crooked lines cause regret.
- Draw a plumb line. Use a level and pencil near a corner. Walls are rarely straight, so trust the line, not the corner.
- Start at the top. Peel back about 12 inches of liner. Line up the edge with your guide and leave an extra inch or two at the ceiling.
- Press from the center out. Use a smoothing tool, and work downward while you pull the liner away slowly.
- Fix bubbles right away. Lift the panel gently, press it again, and chase air toward the edge.
- Match the next panel. Line up the pattern before you press. Follow your product’s rule on seams, either butted or slightly overlapped.
- Trim the edges. Press a straight edge along the ceiling and baseboard, then cut with a sharp blade.
- Handle outlets safely. Turn off power, remove the cover plates, cut an X over the opening, trim the flaps, and replace the cover.
- Press everything again. Go over the seams and edges one more time and leave the wall alone for a day.
Tip: Practice in a closet or a small wall first. Mistakes cost less there.
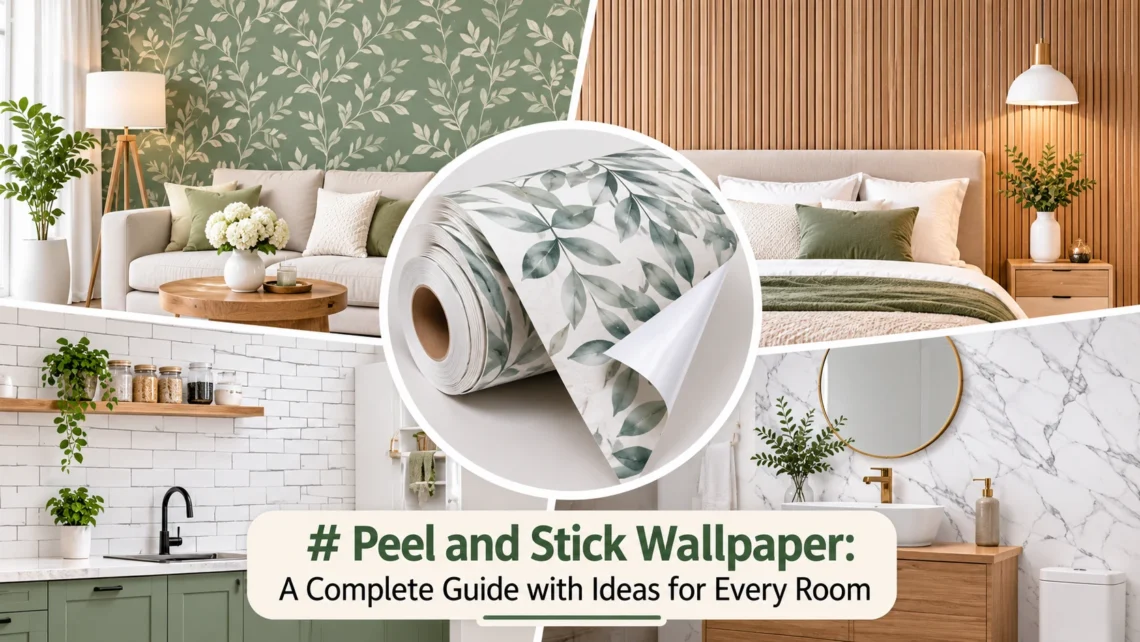
Living Room Peel and Stick Wallpaper Ideas
The living room is where most people start, since a single feature wall changes the whole mood.
Create a Feature Wall
Hang a bold pattern behind the sofa or the TV. Pick one wall only, and keep the rest calm.
Line Your Bookshelves
Cover the back panels of built-in shelves with a color or print. Books and decor pop against it.
Add Texture
Grass-cloth and linen looks bring warmth without a heavy pattern. They hide small wall flaws too.
Frame It Like Art
Add thin molding around the paper to make it look like a giant framed panel. A fresh coat of paint on the trim finishes the look.
Safety note: Keep wall coverings away from a working fireplace and any strong heat.
Bedroom Ideas That Feel Calm and Personal
Bedrooms love soft patterns and cozy textures.
- Headboard wall. A tall panel or mural behind the bed acts like a giant headboard.
- Wardrobe interiors. Line the inside of closet doors for a hidden surprise.
- Dresser refresh. Cover drawer fronts or the back of an open shelf to match your style.
- Kids’ rooms. Murals with animals, maps, or clouds turn a plain wall into a story. Pick a design the child can grow with.
Stick with muted colors if you sleep light. Busy prints can feel loud in the dark.
Kitchen and Bathroom Ideas: Handle With Care
These rooms work, but they need smart choices.
Bathroom
Powder rooms are the best fit. Pick a vinyl product that lists moisture resistance, and run the exhaust fan during showers. Keep it away from direct shower spray and the edge of a tub. Seal the top edge and corners with a thin line of clear caulk when the label allows it.
Kitchen
Use it on a dining nook wall, inside cabinet backs, or behind open shelves. Skip the area behind the stove and any spot near hot appliances. Grease and heat shorten its life. Wipe splashes quickly with a damp cloth.
Check the label for washability and heat limits before you buy.
Entryway, Nursery, and Small Space Ideas
Small rooms take bold patterns well because there is less wall to cover.
- Entryway. Make a strong first impression with a pattern behind a bench and hooks. Choose a scrubbable finish since bags and shoes will bump it.
- Mudroom or laundry room. A cheerful print makes chores feel brighter.
- Nursery. Choose a low-odor product, hang it a few weeks before the baby arrives, and air out the room.
- Stair risers. Cover each riser with a strip of pattern for a surprise on every step.
- Powder room. Go wild here. A dramatic print in a tiny room feels like a jewel box.
How Do You Fix Problems and Remove It Later?
Common Fixes
- Bubbles. Lift the panel and press again. For a stubborn bubble, poke it with a pin and smooth the air out.
- Peeling edges. Clean the wall behind the edge, warm the paper with a hair dryer, and press hard with a smoothing tool.
- Crooked seams. Peel back right away and realign. The adhesive forgives early mistakes, not week-old ones.
- Pattern mismatch. Order extra from the same batch next time, and check every panel before you hang it.
Removal Made Simple
When you remove peel and stick wallpaper, go slowly. Start at a top corner and peel downward at a low angle, close to the wall. Warm stubborn spots with a hair dryer on low heat to soften the adhesive. Wipe any residue with warm soapy water. Try a hidden corner first so you know how your paint reacts.
Ready for a Wall Makeover?
Let’s return to Jordan. After the first wall, Jordan hung a mural in the bedroom and covered the back of a shelf in the hall. Each project took an afternoon, and the lease stayed safe.
Peel and stick wallpaper turns bold design choices into low-risk fun. Prep your walls, measure twice, and match the right pattern with the right room. You will get a fresh look without paint fumes, paste, or a long commitment.
Here is your next move. Order one sample, tape it to the wall for a day, and see how the light treats it. Then share your before-and-after in the comments, or pass this guide along to a friend with a plain wall.